
Ziflite MCP practical guide
Give your AI a controlled connection to WordPress.
Ziflite MCP is a WordPress plugin by Ziflite Studio that exposes supported website operations as structured tools for compatible AI clients. It can help with content workflows, site inspection and, with Pro, supported administration and integrations.
MCP means Model Context Protocol. In this context, it provides a way for an AI client to discover and use the tools your WordPress connection exposes. The available actions depend on the installed edition, enabled capabilities, WordPress account permissions and connected plugins.
What you need
- A reachable WordPress website using HTTPS.
- The current Ziflite MCP Free/Core plugin from Ziflite Studio.
- A compatible AI client supporting the connection and authorization flow.
- A WordPress account with appropriate permissions.
- The separate Pro add-on if you need its advanced capabilities.
1. Install the core plugin
Upload the official plugin ZIP through Plugins → Add New → Upload Plugin in WordPress, then activate it. Open Ziflite MCP and review its status and connection instructions. If using Pro, keep the Free/Core plugin active and install Pro as its add-on.
2. Copy the endpoint shown by the plugin
Open the Connect area and copy the endpoint from your own dashboard. Use the connection details supplied there rather than guessing an endpoint or copying another website’s URL.
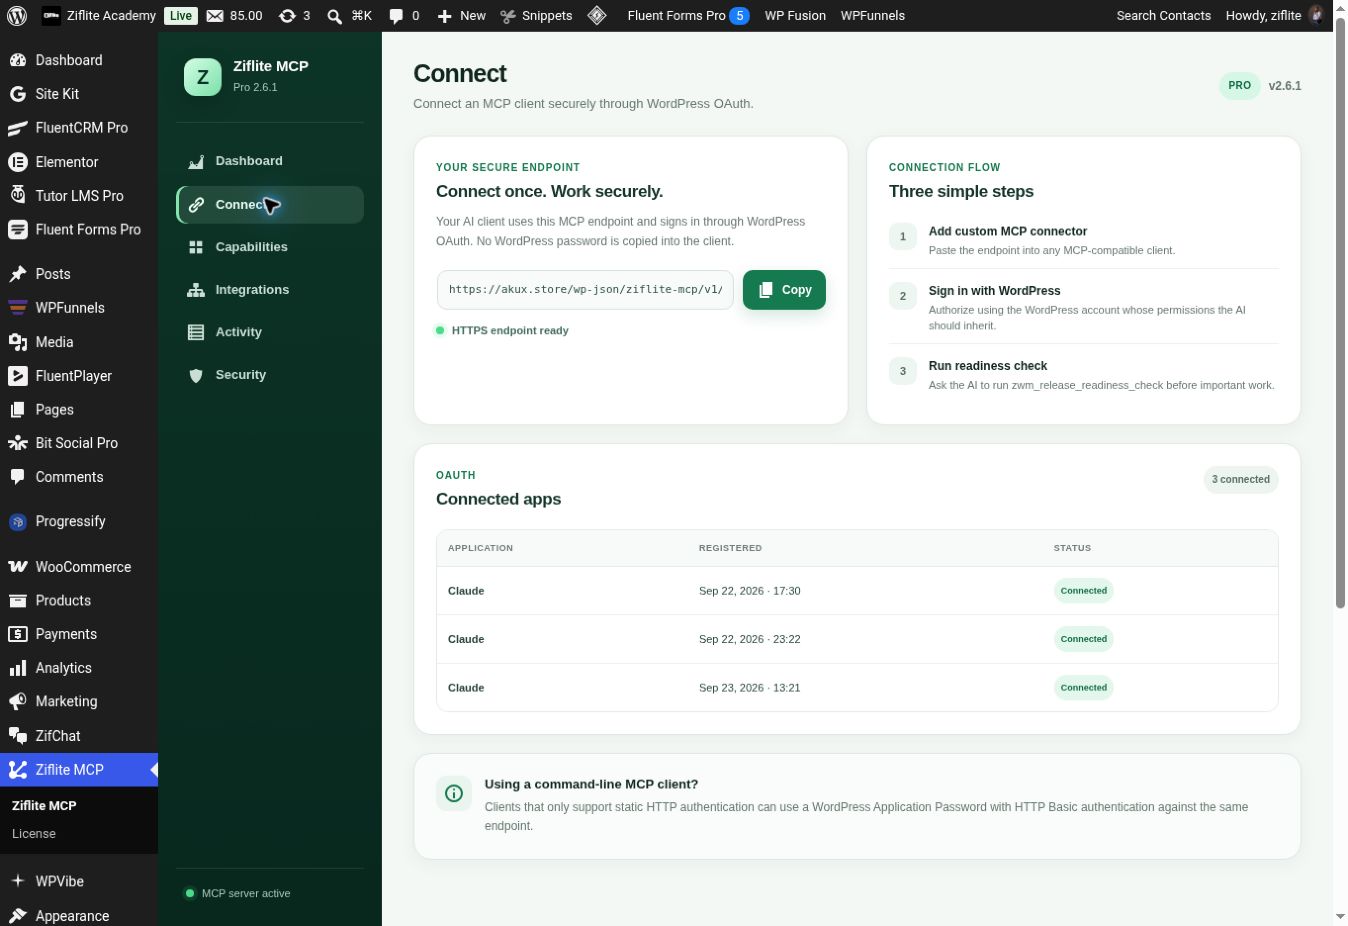
3. Connect your AI client and authorize access
Add the remote MCP connection in your compatible client and follow its authorization flow. Sign in through the secure WordPress authorization page. Do not paste your WordPress password, one-time codes or other secrets into a chat. Client interfaces differ; the illustrated documentation includes a Claude desktop walkthrough.
4. Check capabilities before asking for changes
Ask the connected AI to inspect readiness and report the tools available. Begin with a read-only task such as listing published pages or reviewing site information. Confirm it is connected to the correct website.
Enable only the capability groups needed for your work. Review the scope of a proposed change and use confirmation where the tool requires it. After an approved write, ask the assistant to read back the actual state and verify the result.
Useful first requests
- “List my published pages without changing anything.”
- “Review this page and suggest improvements.”
- “Prepare a service page as a draft.”
- “Tell me which integrations are detected and which tools are available.”
Free and Pro serve different needs
Free provides the core connection and useful content and site-inspection capabilities. Pro extends it with supported advanced administration and deeper integrations. Check the current Free versus Pro guide for the exact capability set.
Common questions
Can every AI app connect?
No. The client must support the MCP connection and authorization pattern used by the plugin. Follow the documentation for your particular client.
Does the connection grant unlimited server access?
No. It exposes supported tools within configured permissions. Arbitrary shell access and unrestricted server control are outside the normal product scope.
What if the connection fails?
Check HTTPS access, plugin activation, client compatibility and the readiness report. Review the troubleshooting documentation before changing security settings.