
Connect your AI to WordPress. Stay in control.
An illustrated guide to installation, Claude desktop connection, permissions, Free and Pro capabilities, safe administration, and troubleshooting.
- Install the Free/Core plugin.
- Copy your MCP endpoint.
- Add a custom connector in Claude.
- Authorize your WordPress account.
- Run readiness and capability checks.
What Ziflite MCP does.
Ziflite MCP connects a compatible AI client to your WordPress site through a single MCP endpoint. The AI sees structured tools for supported WordPress tasks and acts with the permissions of the WordPress account you authorize.
Free/Core supplies the connection and core tools. Pro is a separate add-on that extends the same endpoint, OAuth connection, and dashboard. Keep Free/Core active when Pro is installed. Ziflite MCP does not use a license-key activation screen.
This guide reflects the installed Ziflite MCP Free/Core 2.6.1 and Pro add-on 2.6.0. The precise client menu labels may change with the Claude desktop interface.
Install Free first. Add Pro on top.
Use a WordPress Administrator account and an HTTPS site. Keep a recent backup before changing production plugins.
In WordPress, open Plugins → Add New → Upload Plugin, choose the current Ziflite MCP Free ZIP, install, then activate.
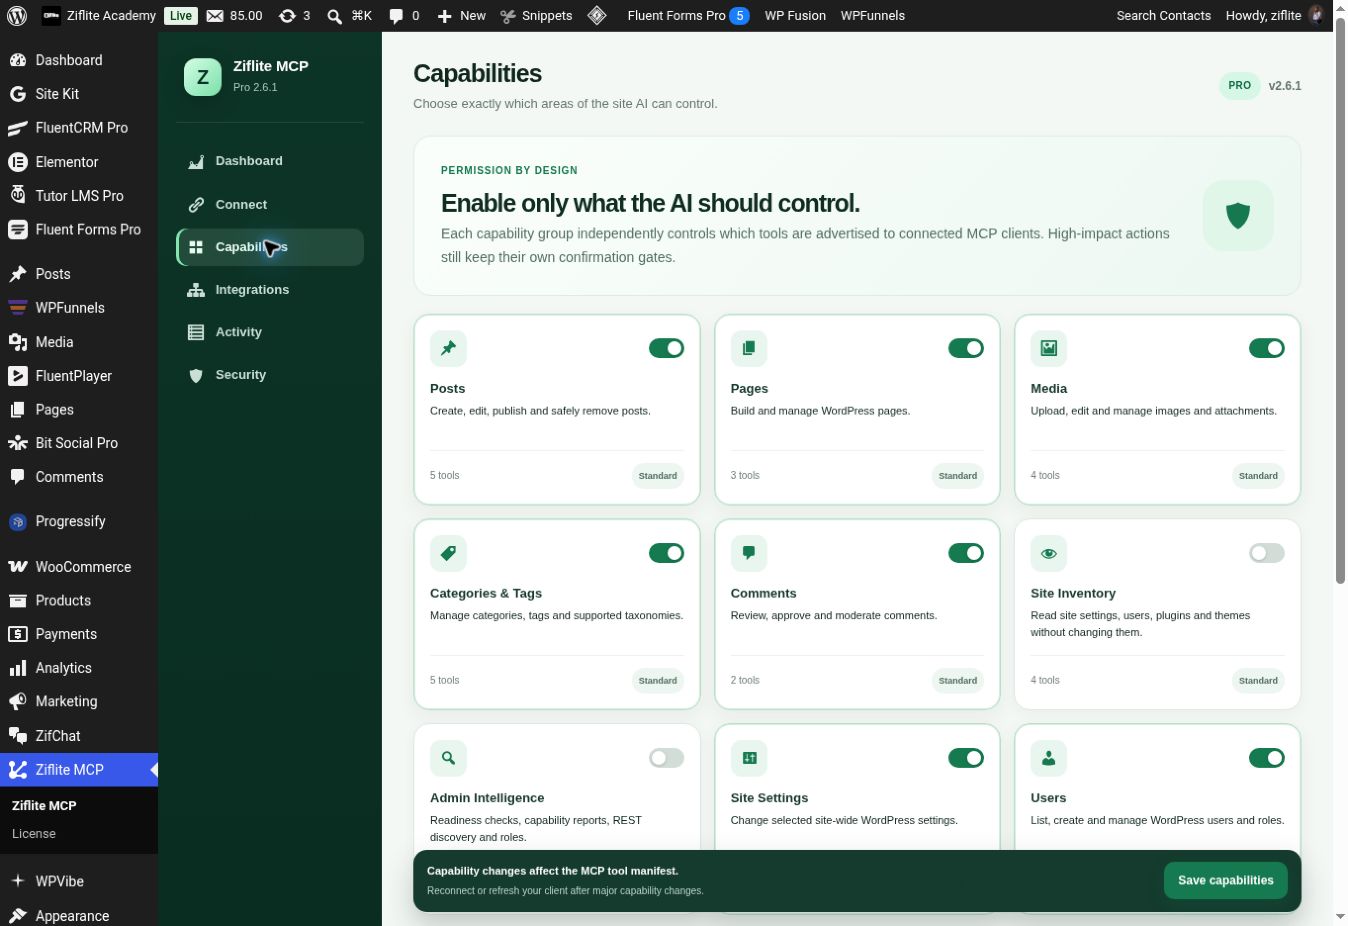
Open Ziflite MCP in the WordPress admin menu. Its tabs include Dashboard, Connect, Capabilities, Integrations, Activity, and Security.
Keep Free/Core active, upload the separate Pro ZIP through Plugins, and activate it. Then review the Pro capability groups.
Connect Claude desktop to your site.
In WordPress, open Ziflite MCP → Connect and use Copy beside “Your secure endpoint.” In Claude desktop, add that URL as a custom MCP connector. Complete the WordPress sign-in and authorization prompt using the account whose permissions you want Claude to inherit.
Start in your WordPress dashboard
- In the WordPress left menu, open Ziflite MCP. Its Dashboard shows whether the MCP server is online, plus a Connect an AI client button.
- Open Connect. Under Your secure endpoint, press Copy. The URL ends in
/wp-json/ziflite-mcp/v1/mcp; copy the complete URL from your site. - Leave WordPress open and follow the Claude screens below. After authorizing, return to Connect → Connected apps to check that Claude shows Connected.
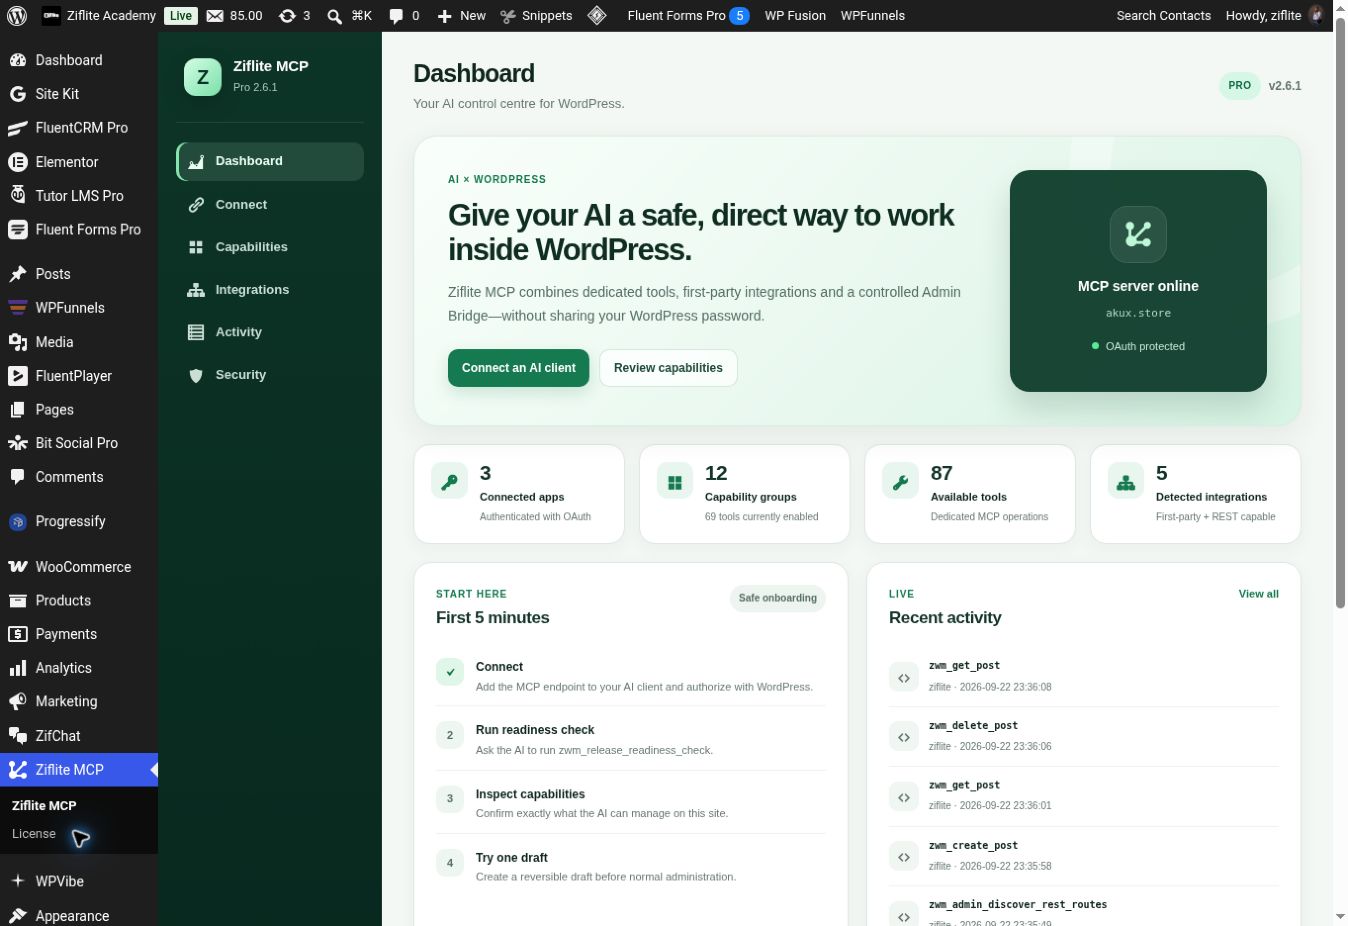
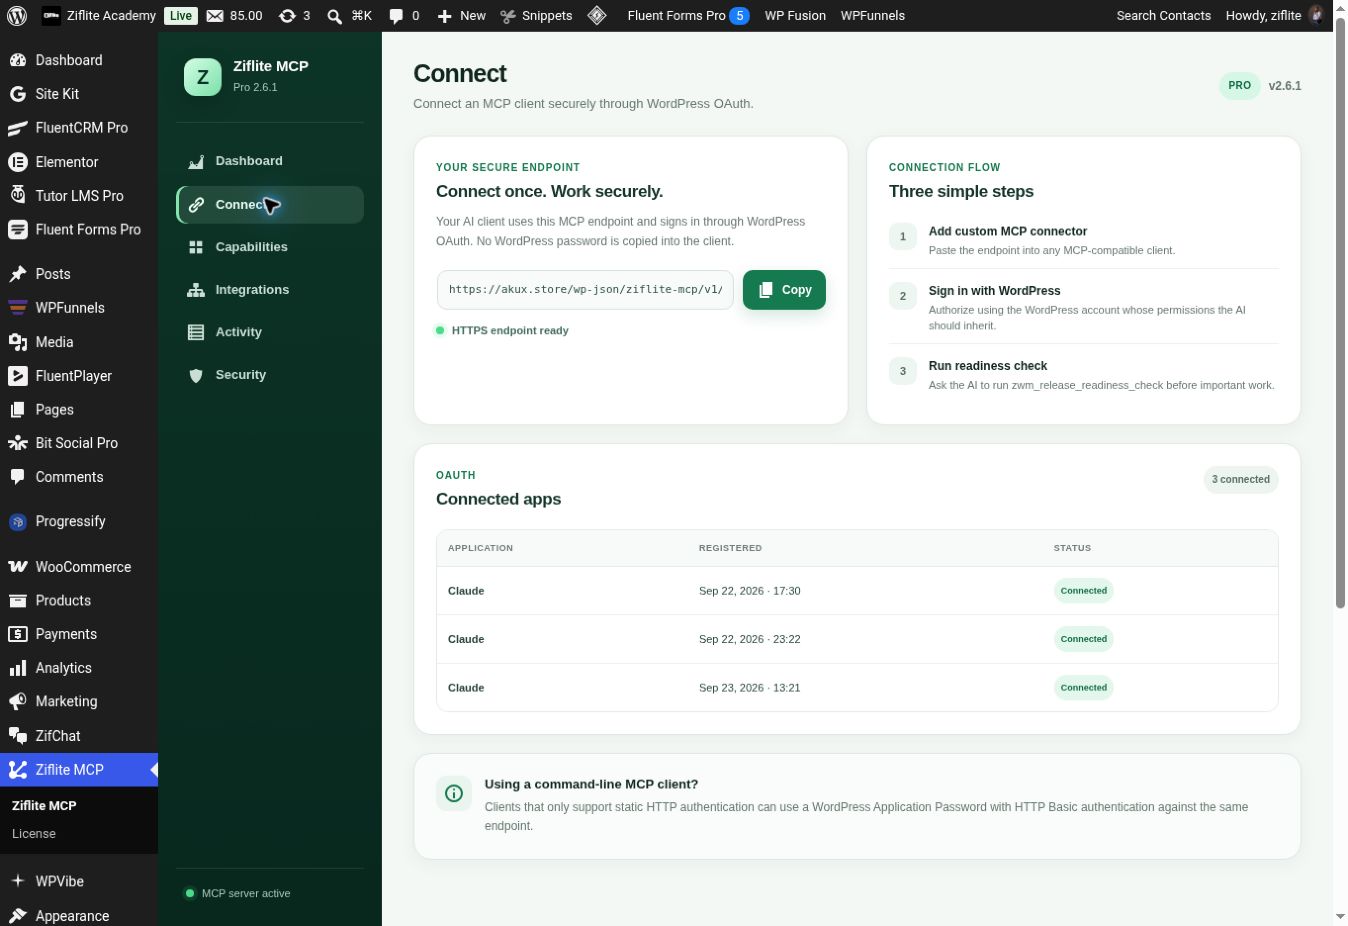
Continue in Claude desktop
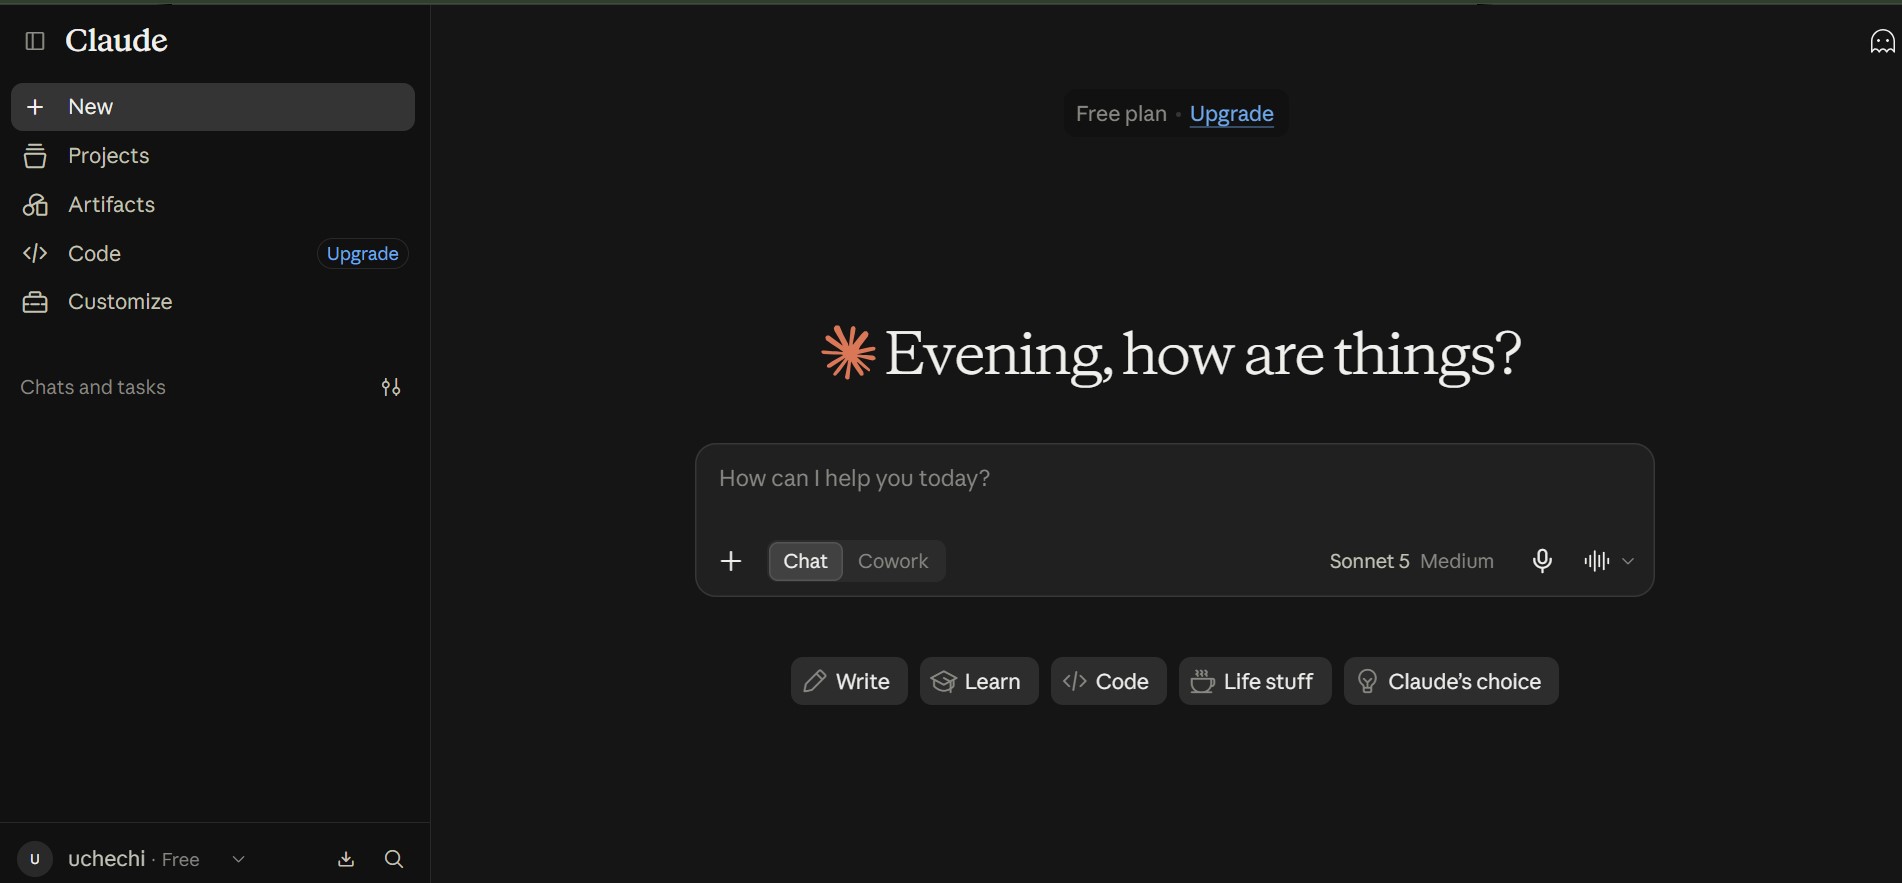
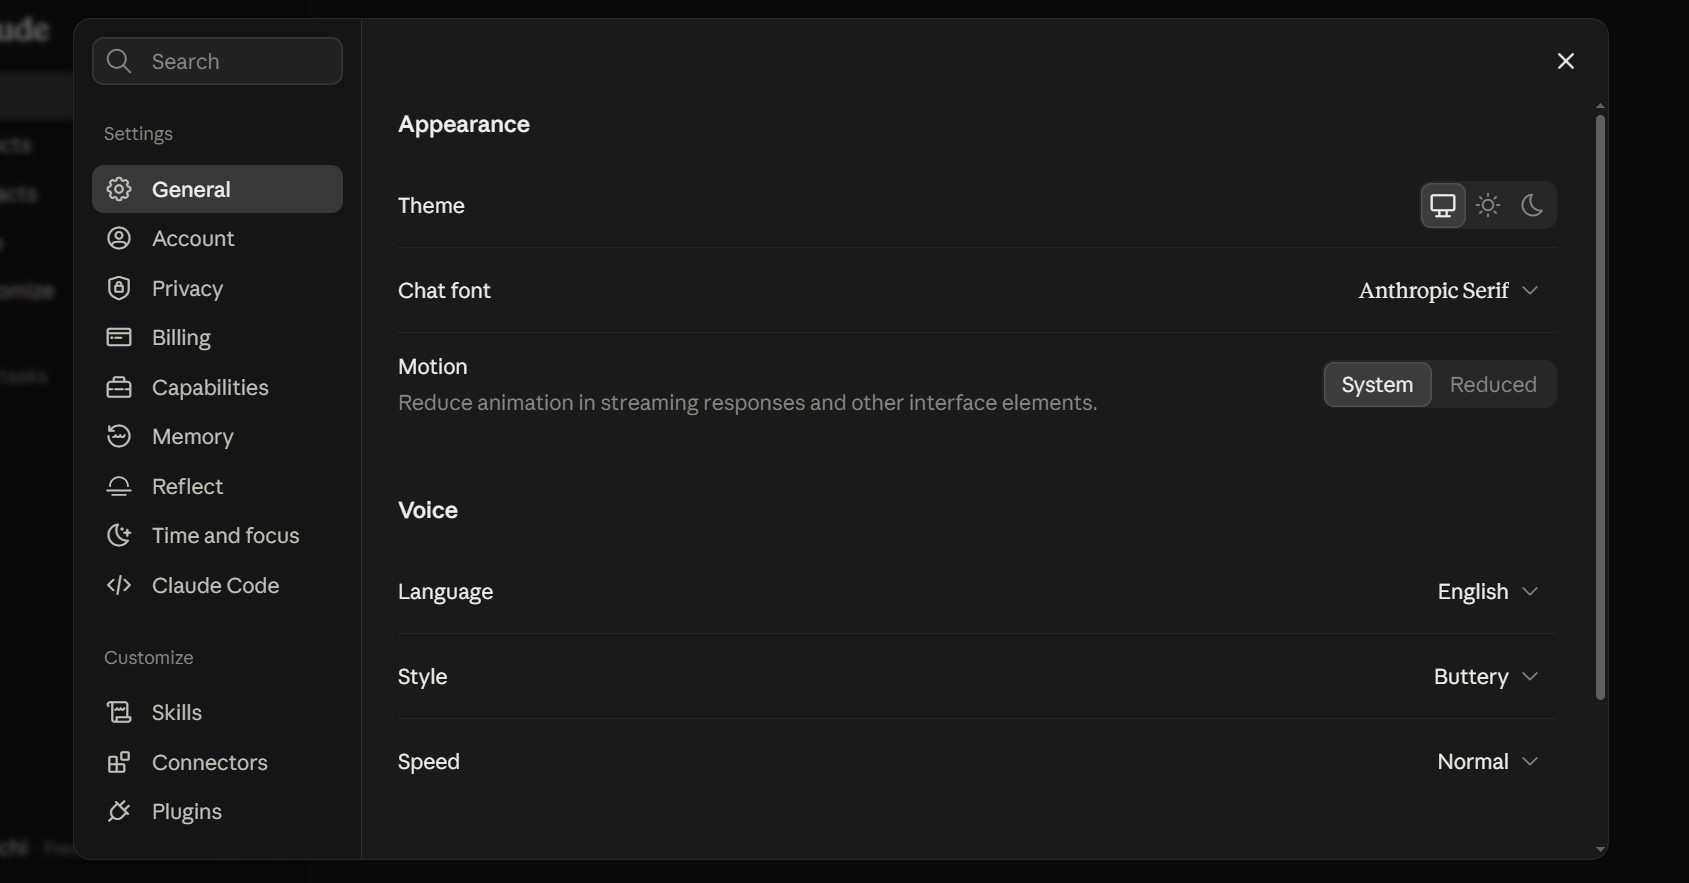
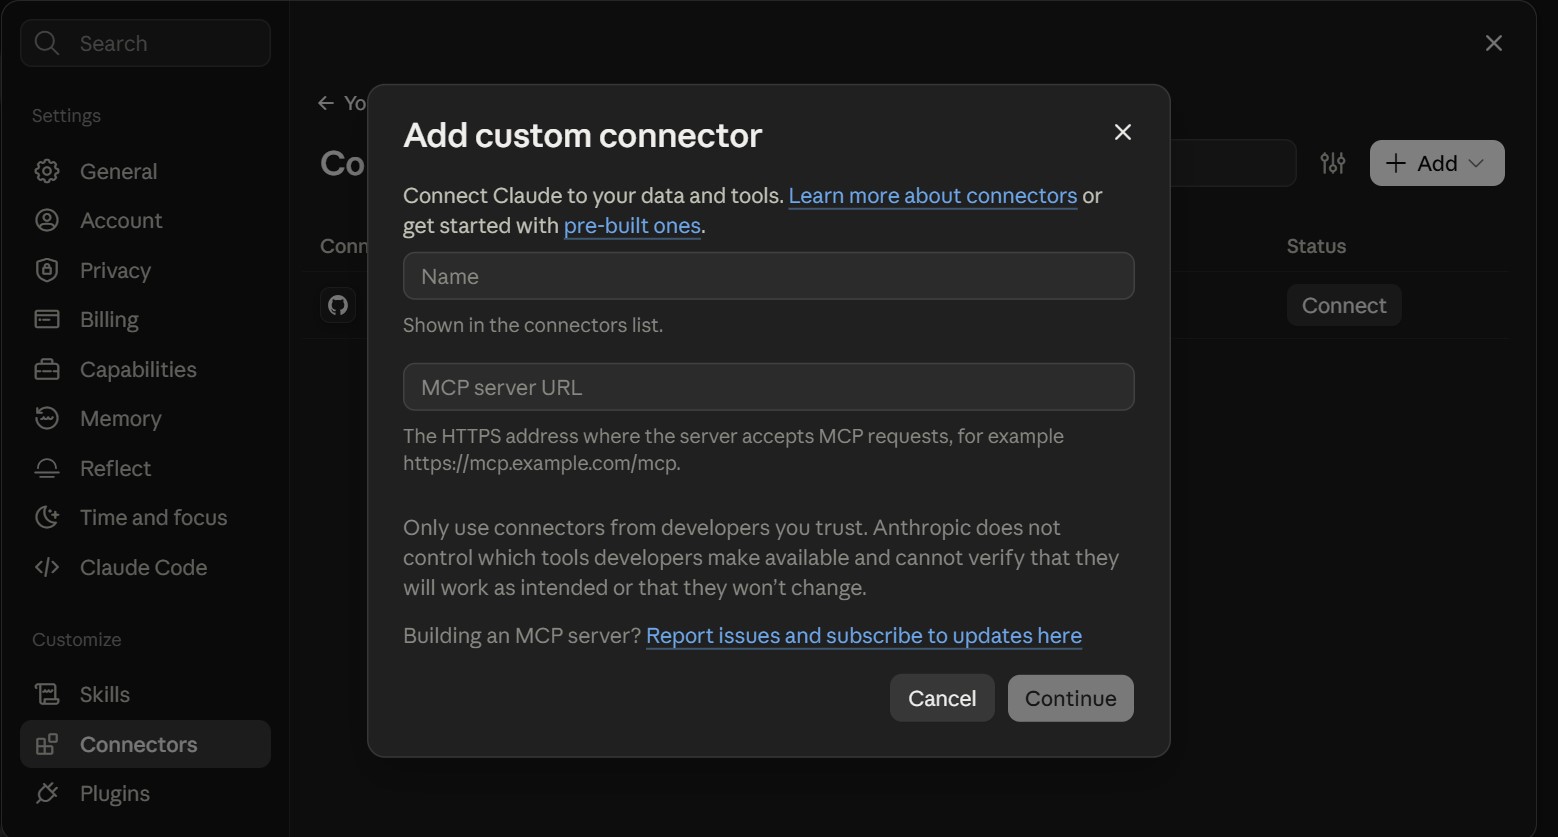
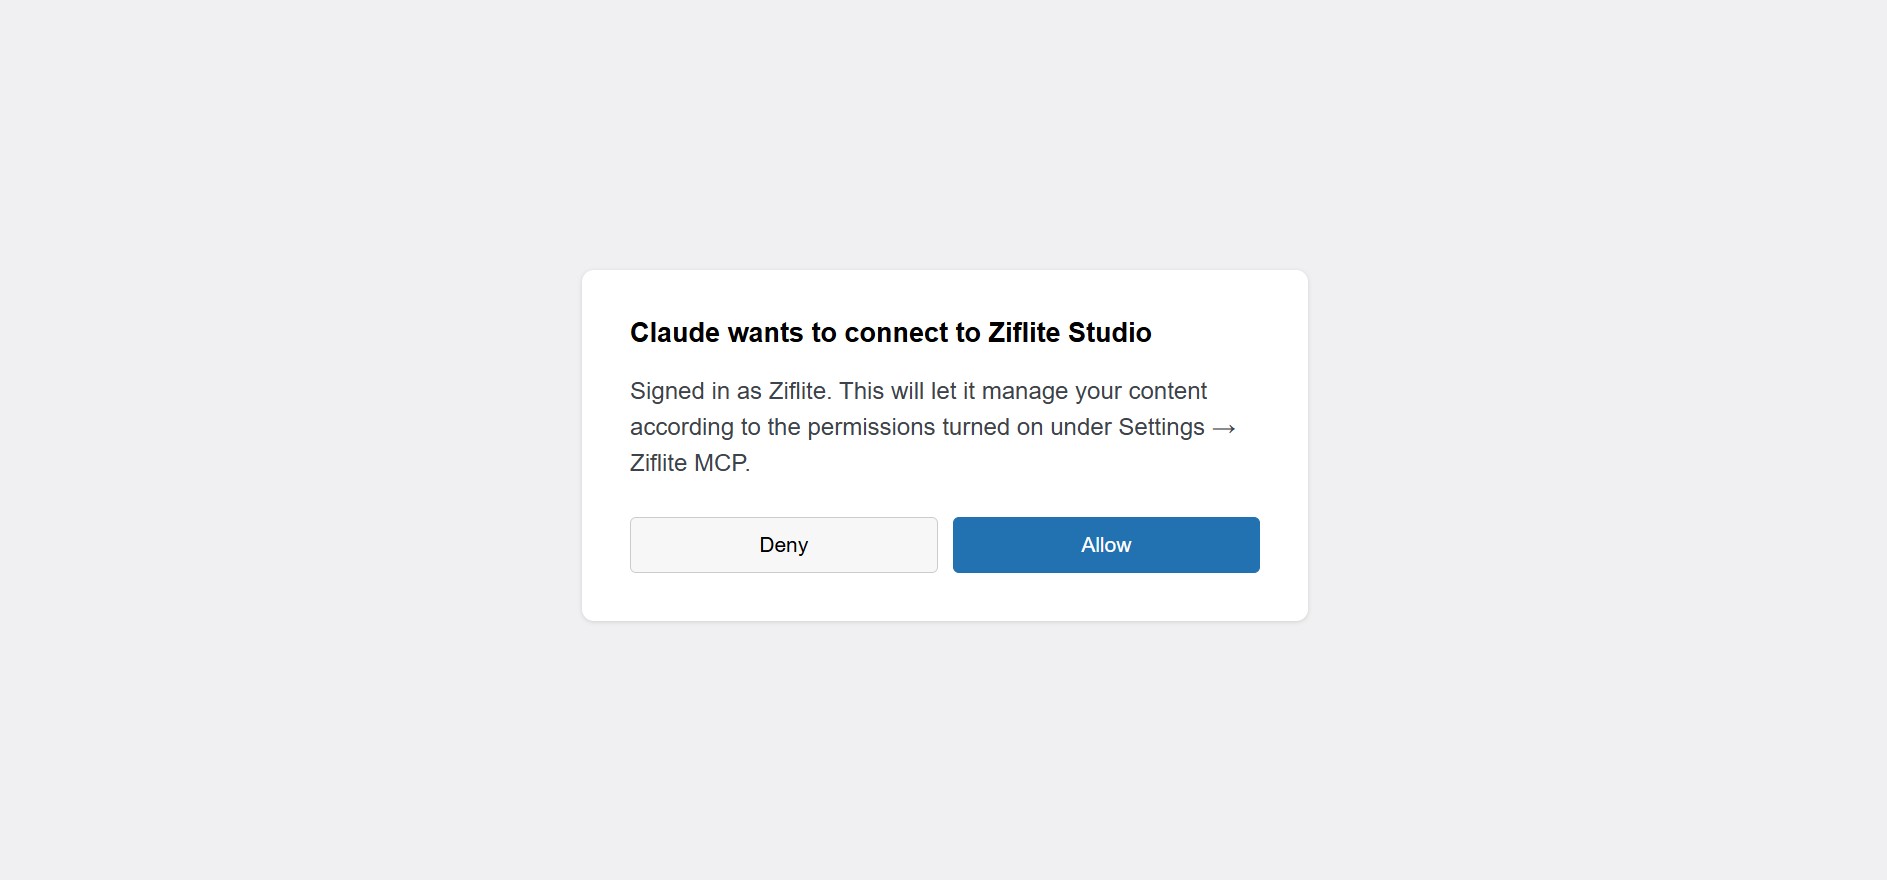
For another OAuth-capable client, use its custom remote MCP connection flow and the same WordPress endpoint. Clients limited to static HTTP authentication may use a WordPress Application Password with HTTP Basic authentication where supported; do not paste a normal WordPress password into the client.
Verify before you edit.
- Ask the AI to run
zwm_release_readiness_check. Address blockers before important work. - Run
zwm_site_capability_reportto see the tools, integration detection, disabled groups and limits on this site. - Try a harmless read: “List my recent posts” or “Show installed plugins.”
- When ready to test writes, create a disposable draft, verify it in WordPress, then move it to Trash.
Know where each control lives.
| Admin tab | What you use it for |
|---|---|
| Dashboard | Connection status, enabled group count, onboarding steps and recent activity. |
| Connect | Copy the secure MCP endpoint and review connected OAuth applications. |
| Capabilities | Enable only the tool groups the AI should see; save and refresh the client afterward. |
| Integrations | See detected plugins and whether their dedicated capability group is enabled. |
| Activity | Review recorded tool activity and outcomes. |
| Security | Review permissions, connected apps and safety boundaries. |
Detection of FluentCRM, Fluent Forms, or ZifChat does not by itself enable every action. The relevant plugin must be active, the capability group enabled, and the authorized WordPress user must have permission.
Free and Pro at a glance.
| Capability | Free/Core | With Pro add-on |
|---|---|---|
| MCP endpoint and WordPress OAuth | Included | Same connection |
| Posts, pages and core content | Core create, read and edit flows | Additional supported actions |
| Media | List and upload | Advanced edit and delete |
| Categories, tags, comments | Read and core moderation | Advanced taxonomy actions |
| Site inventory and readiness | Read-only reports | Included |
| Users, settings, plugins, themes | Inventory reads | Supported administration |
| FluentCRM and Fluent Forms | Detection and visibility | Dedicated advanced workflows |
| ZifChat | Detection | First-party agents, knowledge, analytics and AI controls where supported |
| Admin Bridge | Read-oriented REST discovery | Supported authenticated writes when explicitly enabled |
Use the extra tools deliberately.
Pro adds dedicated actions for plugin and theme lifecycle management, users, settings, advanced media and taxonomy, FluentCRM, Fluent Forms, and ZifChat. The Admin Bridge can use supported authenticated WordPress or plugin REST routes when no dedicated wrapper exists; keep it disabled unless you intend to grant broad generic REST administration.
ZifChat and Fluent tools
If ZifChat is installed on the same site, enable its Pro capability group to expose supported agent, knowledge, analytics and AI controls. ZifChat owns its data and permission checks. For FluentCRM and Fluent Forms, enable their groups only for the workflows you plan to use. Sending campaigns or other high-impact actions requires a review and confirmation flow.
Example requests
- “Show the capability report and tell me which integrations are ready.”
- “List my ZifChat agents and business-hour settings.”
- “Inspect the form and explain why its notification may be failing.”
- “Prepare a plugin update plan and show me the proposed changes before doing anything.”
Tool availability depends on installed integrations, enabled groups, the authorized user’s WordPress permissions and the installed plugin versions.
Grant the right level of access.
After connecting, open Ziflite MCP → Capabilities to choose which tool groups are advertised to the AI. The switch state shown below belongs to the example test site; select groups appropriate for your own site and save changes only when you intend to change access. Refresh the client after changing capabilities.
- OAuth: Claude redirects to WordPress to sign in and approve access. Tokens are tied to the authorized WordPress user.
- WordPress roles: Tools still check WordPress and plugin capabilities. A connector cannot grant more than the authorized account has.
- Capability switches: Disabled groups are absent from the advertised MCP tool list.
- Confirmation gates: Higher-impact actions preview what will happen and require explicit confirmation.
- Boundaries: The normal toolset does not offer unrestricted filesystem editing or arbitrary SQL execution.
Update in place, then reconnect.
- Back up the site before major updates.
- Install the current Free/Core ZIP over the existing
ziflite-wp-mcpplugin folder. Do not install a second copy under a different folder name. - Update the Pro add-on separately, keeping compatible Free/Core active.
- Reconnect or refresh the MCP client, run the readiness and capability reports, and verify a harmless read.
To return to the Free capability set, deactivate the Pro add-on while leaving Free/Core active. ZifChat and its separate license are unaffected.
Troubleshooting and common questions.
| Symptom | Check |
|---|---|
| Claude cannot connect | HTTPS, the endpoint copied from the Connect tab, OAuth completion, plugin activation and the WordPress account used. |
| Tools missing after an update | Refresh or reconnect the connector; begin a fresh Claude session to reload the tool manifest. |
| Pro tools missing | Both plugins active, version compatibility, desired Pro groups enabled, and connector refreshed. |
| Integration not visible | The integration plugin active on the same site, its group enabled, and a fresh capability report. |
| Action denied | Authorized WordPress user’s role, the relevant capability switch and any confirmation step. |
| Admin Bridge action blocked | Pro active, Admin Bridge deliberately enabled, Administrator permissions, and route safety restrictions. |
Do I enter a Ziflite MCP license key?
No. Pro is a separate add-on; its supported features become available when it and Free/Core are active.
Does ZifChat use the same license?
No. ZifChat is a separate product with its own license system.
Can the AI read private WhatsApp conversations?
Ordinary ZifChat click-to-chat does not expose private WhatsApp message content or delivery status to Ziflite MCP.
Does a connected AI get unrestricted server access?
No. It receives supported structured tools and approved REST routes, subject to capability and permission checks.
Download the PDF companion.
Use the PDF for offline instructions. Its screenshot panels link to the four full-size Claude screens in this website guide.